
*This post may contain affiliate links. As an Amazon Associate we earn from qualifying purchases.
Removing the door panel of a Toyota Land Cruiser may sound like a task reserved for the knights of auto repair, but fear not! With the right tools and a pinch of patience, anyone can become the hero their Land Cruiser deserves. Whether you’re aiming to upgrade the speakers, troubleshoot a pesky power window issue, or simply want to give your beloved vehicle a thorough cleaning, getting the door panel off is the first step on your quest.
Embarking on this panel-popping journey doesn’t require an engineering degree, just some basic tools and the bravery to dive in. Gather your trusty screwdrivers, pliers, and a door panel removal tool (or a suitable knight’s equivalent) and approach your steed—erm, Land Cruiser—with confidence. Remember, rushing into battle without a plan could lead to snapped clips or scratched finishes, so take it slow and treat each step as a strategic move in your automotive conquest.
Key Takeaways
- Removing the door panel is achievable with basic tools and careful technique.
- Patience is key to avoid damage during the removal process.
- Reassembly should mirror the removal steps for a successful conquest.
Preparation Mayhem
Embarking on the task of removing the door panel from a Toyota Land Cruiser is like setting up the board for a strategic game of Operation – it requires finesse, the right tools, and a tactical approach. One must approach this task with a blend of precision and whimsy to avoid turning their Cruiser into an unintentional jigsaw puzzle.
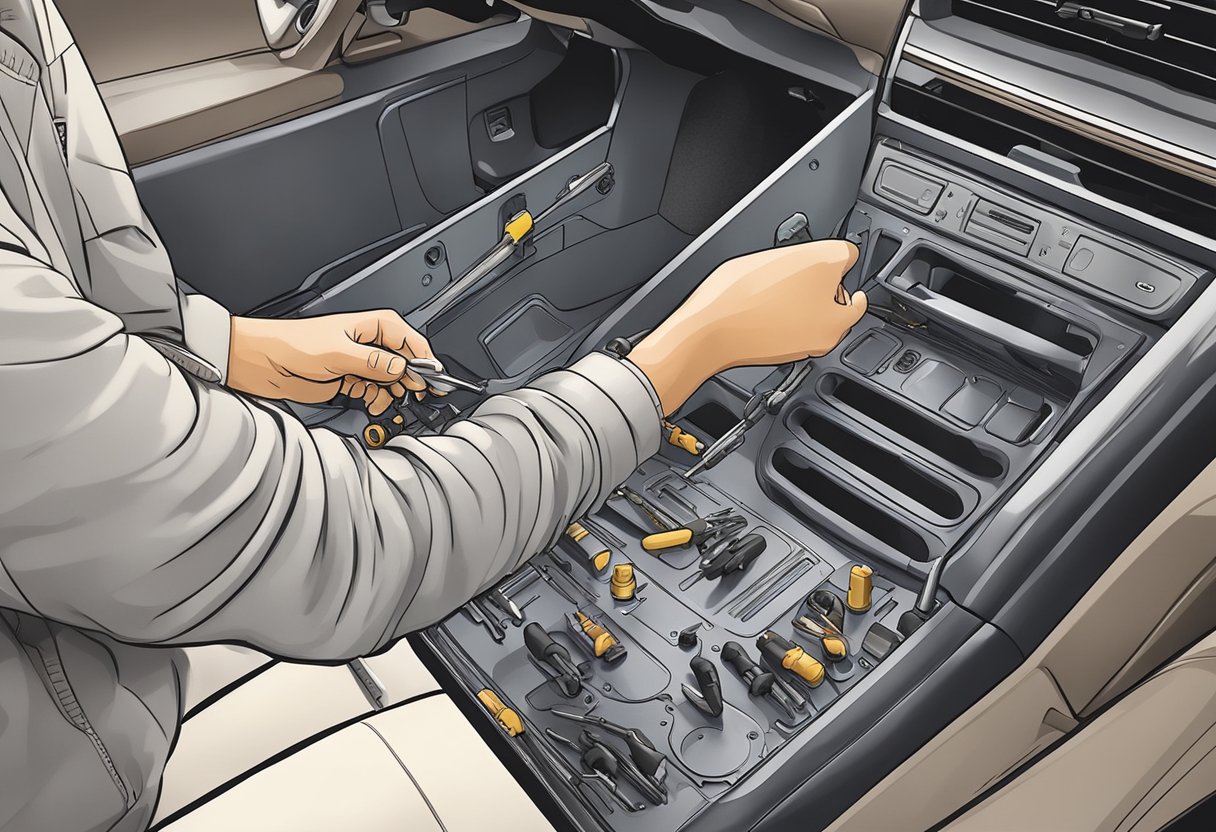
Grasping the Great Toolkit
One does not simply walk into Mordor, and similarly, one does not start prying off door panels without arming oneself with an arsenal of tools that would make MacGyver proud. They’ll need:
- Screwdrivers of various sizes, because screws on a Land Cruiser are much like opinions – everyone’s got a different one.
- A clip removal tool, for plastic clips that cling onto the panel like a cat to a warm laptop.
The enthusiast might even fancy a service manual as a map to guide them through the wild terrain of their door’s interior.
Playing with Panels
Before the symphony of disassembly begins, they must locate the hidden treasure – screws and clips that keep the panel affixed. The player typically reveals their hiding spots behind the:
- Interior door handle trim piece, which is often more deceptive than a mirage in the desert.
- Master window bezel; a fancy term for the plastic that thinks it’s the boss of the window switches.
It’s a game of hide and seek, and their prize is the eventual detachment of the door panel from its steely steed.
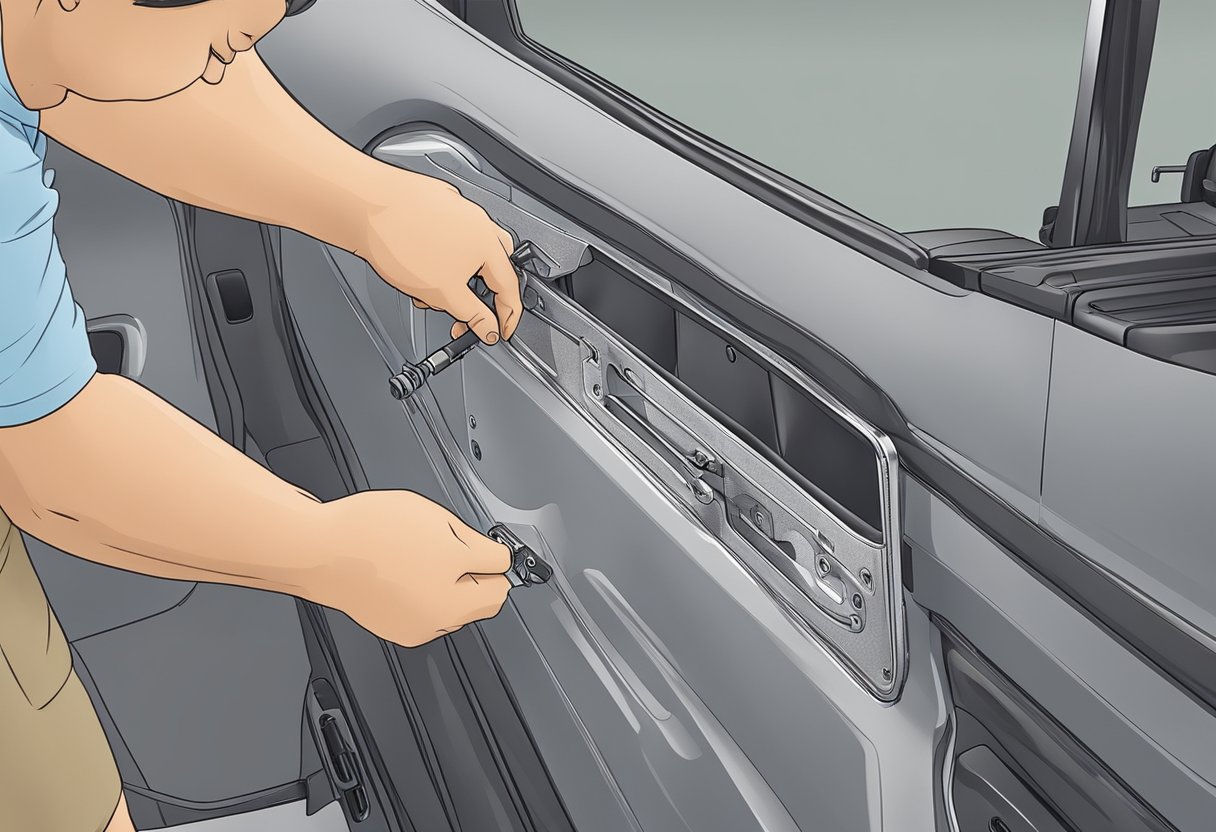
Disassembly Dance
With tools in hand and panel parts uncovered, the dance of disassembly can commence. It’s a delicate tango between man and machine, each step carefully choreographed:
- Unscrew with a deft twist, careful not to strip the screw – it’s not that kind of party.
- Gently pry the clips with a tool, they should pop out like corn kernels in a microwave – minus the buttery goodness.
- Wiggle the panel free; it’s less “Hulk Smash!” and more “Fred Astaire glide.”
They proceed with a combination of confidence and caution, knowing that one wrong move could lead to a snapped clip or a dented ego.
Daring Door Panel Removal
https://www.youtube.com/watch?v=da-6sk8QSYA&embed=true
Embarking on the quest to liberate a door panel from the clutches of a Toyota Land Cruiser can be equal parts thrilling and peculiar. The process requires a keen eye, steady hands, and the uncanny ability to spot the elusive screws and clips that hold the panel in its place as if guarding an ancient secret.
The Legend of the Hidden Screws
They say not all screws want to be found, hiding under plastic screw caps and masquerading as part of the door’s design. These fasteners are no match for the mighty Phillips screwdriver, the tool of choice for any would-be door panel conqueror.
- Locations to Conquer:
- Under the armrest, where screws lay in wait.
- Behind the door handle, where a square-looking cover plays gatekeeper.
- Near the door’s edge, where screws might be masquerading beneath color-matched caps.
Clipping Along to Victory
A true adventurer knows that clips are the silent heroes of door panel terrain. Each plastic clip snaps into place with a satisfying click, but they demand respect—or else one risks the sound of snapping plastic, the bane of any DIY attempt.
- Clip Champions:
- Use a flat tool to pry gently around the door and defeat circular clips.
- The lock and unlock knob harbors a sneaky metal spring clip, requiring finesse and a tad of wiggling.
The Grand Finale: Lifting the Panel Off
As the screws and clips concede defeat, the celebrated moment arrives. Lifting the door panel should be done with the grace of a ballroom dance and the caution of handling a sleeping dragon. The panel lifts away, revealing the hidden world behind it, ready for whatever service or repair awaits.
- Victorious Steps:
- Pull the panel straight up to unhook it from the top ledge.
- Disconnect any electrical connectors with the gentleness of a butter knife through cream cheese.
Door panel removal is not just about following steps; it’s a dance, a battle, and a show of skill that culminates in the triumph of man over machine—or rather, DIYer over door panel.
Let’s Not Forget The Extras

When one decides to embark on the noble quest of removing a Land Cruiser’s door panel, they often focus on the main event and tend to overlook the supporting cast of extras that make a world of difference. Removing a door panel is not just about getting rid of the main panel; one must also pay homage to the various components that are like the unsung heroes in this automotive drama.
Rear Door: This door might argue it’s the protagonist’s stunt double with all the action it sees. One must ensure all screws and clips are removed before attempting to remove the panel, just like coaxing a reluctant cat out of a tree.
Disc: Some might find a disc within the door assembly that is as tricky to dislodge as a well-thrown frisbee on a roof. A gentle pry may persuade it to come loose.
Glass: Moving the glass is a clear (pun intended) necessity. Proceed with care as if handling Cinderella’s slipper.
Speaker: In the symphony that is door disassembly, the speaker is the soloist who doesn’t want to leave the stage. Disconnect it gently or it might hit the wrong notes next time.
Hood: Wait, the hood? Nope, it has nothing to do with the door panel but wanted to be mentioned. Let’s humor it; after all, it covers your engine like a steel blanket.
Illustration: Keeping a visual aid can make this less of a guessing game. They say a picture is worth a thousand words; in this scenario, it might save one a thousand headaches.
Assist Grip: This part is like the friend who’s always there to help you keep your balance. Detach it with kindness.
Quarter Window Glass: Last but certainly not least, this glass maybe just wants a peek outside. Meet its gaze, then remove any fixtures attaching it to the door.
Remember, folks, these extras deserve their day in the sun too, and without them, your door panel removal scene just won’t be the same blockbuster hit.
Reassembling Rhapsody
Once they’ve triumphed over the disassembly of their Toyota Land Cruiser’s door panel, the intrepid DIYer must face the final boss: reassembly. The goal is to avoid any leftover parts that leave them wondering if they’ve accidentally stumbled upon an unsolvable mystery of the universe.
Firstly, one should place the door panel nearby and sigh dramatically at the sight of the empty door frame—it signals progress.
Reassembly Checklist:
- Ensure all screws are accounted for—like squirrels before winter, none should remain unhidden.
- Clip locations should be noted; they’re as crucial as finding the right dance partner at a ball.
- The speaker must be connected with the grace of a maestro conducting an orchestra.
- Trim panel should be aligned like stars in the constellation—perfectly!
Steps:
- Screw in the speaker with the tenderness of a bee pollinating a flower.
- Snap in the assist grip plugs; think of it as a delicate “whack-a-mole” game.
- Damper to be placed with the stealthiness of a cat on a midnight prowl.
- Clip by clip, the door panel must be guided back onto the door frame—like a spaceship docking in its bay.
- A final flourish of the screws, and like magic, the mystery of the door panel is solved!
Remember, reassembly should have the rhythm and flow of a well-rehearsed symphony—each piece in harmony with the next. With a little bit of laughter and a lot of patience, they’ll have their Toyota Land Cruiser looking as splendid as if it rolled right out of the showroom, brandishing its door panel with pride.